

When you invest in a LogoJET system, you get more than equipment, you’re set up for success from the start with expert installation, precision calibration, and a system ready to produce from day one.
Every printer purchase includes onsite installation by a certified LogoJET technician, giving you the confidence that your investment is set up for maximum performance, accuracy, and long-term reliability.
Onsite installation is included with every printer purchase!
What to Expect Before Installation
-
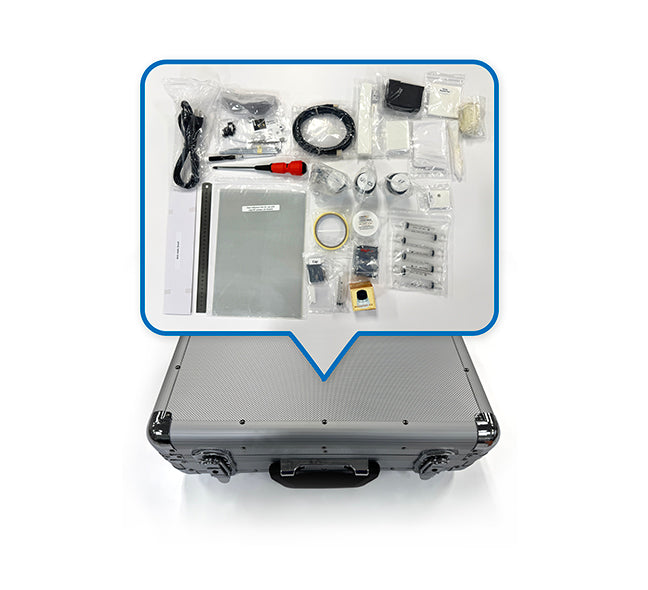
Supply Shipment & Welcome Kit
Your supplies will arrive separately from your printer and include a LogoJET Welcome Kit with essential tools and materials for installation and ongoing maintenance.
-
Pre-Installation Call
Prior to installation, a LogoJET technician will schedule a call to:
- Review your setup requirements
- Confirm site readiness
- Align on expectations for installation and training


Watch LogoJET customer, Maker Experiment, as he unboxes his printer:

Day 1: UV Printer Installation, Calibration & System Setup
Day 1 is focused on complete system installation and precision calibration to ensure your printer operates at peak performance.
Your technician will:
- Inspect the printer for any shipping-related damage
- Unpack and prepare the system for operation
- Configure the connected production computer
- Install RIP software and printer drivers
- Load UV inks and perform initial maintenance (head cleanings and nozzle checks)
- Verify electrical requirements and system readiness
- Complete full printhead alignment and calibration (this process may take several hours)
Once the system is fully installed and calibrated, your technician will provide a foundational overview of printer operation, software, and basic workflow setup.
Important: Day 1 ensures your system is installed and performing at its best. From there, Day 2 is dedicated to hands-on training and building confidence with your production workflow.

Day 2: Guided Training & Application Workflow Setup
Day 2 focuses on helping your team begin operating the system and understanding core UV printing workflows.
This may include:
- Continued guidance on RIP software and file setup
- Basic tray alignment and job preparation (if applicable)
- Printing initial sample products across common substrates
- Review of maintenance routines and best practices
- Backup of system configuration files
- Open Q&A to address immediate operational questions
Note: Day 2 training reinforces foundational knowledge and introduces real-world applications. Advanced techniques such as texture printing, ADA/Braille, rotary printing, and production optimization are developed over time with continued use and support.

Ongoing Training & Support
What truly sets LogoJET apart is what happens after installation.
We provide:
- U.S.-based technical support from experienced professionals
- Continued training resources and application guidance
- Workflow optimization tailored to your business and industry
- Access to proven substrates, profiles, and production strategies
Our goal is to help you move beyond setup to scaling production, increasing margins, and maximizing ROI.
Why Customers Choose LogoJET Installation
- Expert Installation: Certified technicians ensure precise setup and calibration
- Real-World Guidance: Training focused on practical workflows, not theory
- Production-Ready Results: Your system is optimized before you begin printing
- Long-Term Partnership: Ongoing support to help you grow and scale

Be Fully Prepared: Site Requirements Checklist
To ensure a seamless installation, we require completion of a Site Survey & Readiness Checklist prior to your technician’s arrival.
This guide helps prevent delays and ensures your environment is ready for production.
What’s Included:
✔️ Unpacking instructions for safe crate removal
✔️ Doorway and pathway clearance requirements
✔️ Electrical specifications (voltage, grounding, outlets)
✔️ Environmental guidelines (temperature, humidity, ventilation)
✔️ Team and material readiness checklist
Watch LogoJET customer, Maker Experiment's onsite training experience: